
Craftsman Garage Door Opener 1/2 HP Manual: A Comprehensive Guide
This manual provides detailed instructions for Craftsman 1/2 HP garage door openers, covering models like 53479, 139.53978SRT, and 139.53915D.
It outlines warranty details, including a 90-day full warranty and a limited one-year warranty on parts.
Resources like the Internet Archive offer downloadable user guides for various Craftsman models, aiding in installation, operation, and troubleshooting.
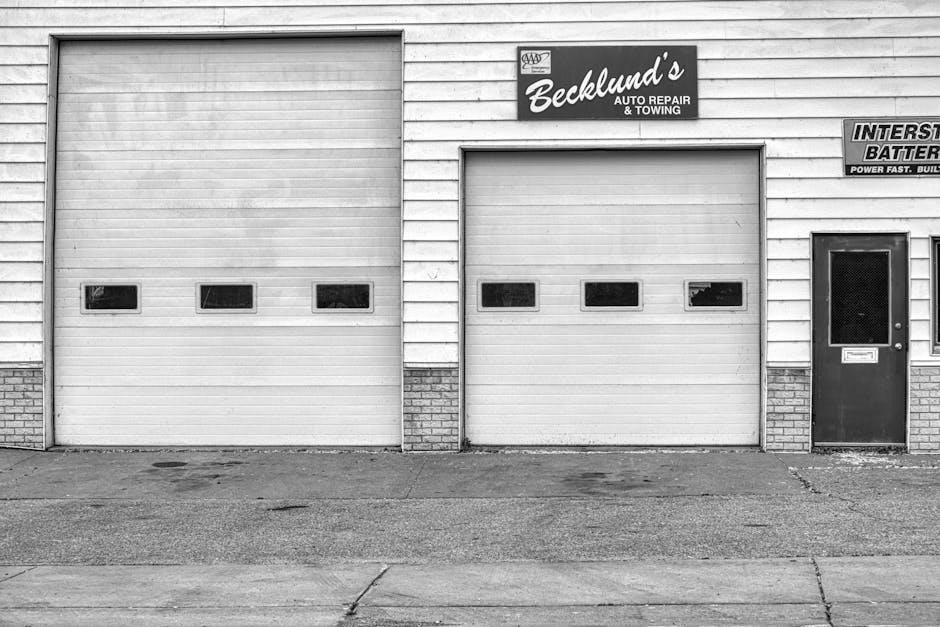
Craftsman 1/2 HP garage door openers are renowned for their reliability and residential use focus. These openers, including models 53479 and variations like 139.53978SRT, offer convenient access to your home.
Understanding the specific model is crucial, as manuals are readily available through resources like the Internet Archive, ensuring proper installation and maintenance for optimal performance.
Model Numbers and Variations
Craftsman offers several 1/2 HP garage door opener models, each with unique features. Common numbers include 53479, 139.53978SRT, 139.18473D, and 139.53915D. Identifying your specific model is vital for accessing the correct manual, often found on the Internet Archive. Variations exist, impacting parts and troubleshooting procedures.
Identifying Your Specific Model (e.g., 53479, 139.53978SRT, 139.18473D, 139.53915D)
Locate the model number on the opener unit itself, typically on a sticker. Common examples are 53479, 139.53978SRT, 139.18473D, or 139.53915D. This number is crucial for downloading the correct user manual from resources like the Internet Archive, ensuring accurate installation and repair guidance.
Differences Between Craftsman 1/2 HP Models
Variations exist between Craftsman 1/2 HP models, impacting manual specifics. While sharing core functionality, differences may include features, wiring diagrams, and component layouts. Accessing the manual specific to your model number (e.g., 53479, 139.53978SRT) from the Internet Archive is vital for accurate guidance.
Safety Precautions
Prioritize safety during installation and maintenance of your Craftsman 1/2 HP opener. Always disconnect power before working on the system. Heed all warnings in the manual regarding potential hazards. Proper safety sensor alignment is crucial to prevent accidental door closure and potential injury.
General Safety Guidelines
Always keep children and pets away from the garage door during operation. Never run the opener unless the door is fully visible and free of obstructions. Regularly test safety sensors to ensure proper function. Disconnect power before performing any maintenance or repairs to avoid electrical shock.
Warnings Regarding Installation and Maintenance
Improper installation can lead to serious injury or damage. Always follow the manual’s instructions carefully. Disconnect power before any maintenance. Never alter the opener’s safety features. Seek professional assistance if unsure about any step. Failure to heed warnings voids the warranty.
Installation Guide
Proper installation is crucial for safe and reliable operation. This guide details the necessary tools and a step-by-step process. Ensure the garage door is balanced before beginning. Carefully follow all instructions, referencing diagrams when available. Professional installation is recommended if you lack experience.
Tools Required for Installation
Successful installation demands specific tools. You’ll need a ladder, safety glasses, a socket wrench set, screwdrivers (Phillips and flathead), adjustable pliers, a drill with various bits, a level, and measuring tape. Wire strippers/crimpers are essential for electrical connections, alongside a voltage tester for safety.
Step-by-Step Installation Process
Begin by assembling the opener unit, then securely mounting the rail to the ceiling joists. Connect the opener to the door using the provided arm. Carefully wire the unit, ensuring proper grounding. Adjust travel limits and safety sensors, then test operation with the remote and wall control.
Operating Instructions
To operate, press the remote control or wall panel button. The opener will activate, raising or lowering the garage door. Ensure the safety sensors are unobstructed for proper function. Regularly test the safety reverse feature. Refer to the manual for programming additional remotes and troubleshooting.
Using the Remote Control
The remote control activates the garage door opener wirelessly. Ensure fresh batteries are installed for optimal range and performance. Programming instructions are detailed in the full manual, allowing for additional remotes to be paired. Keep the remote in a secure location, away from children.
Using the Wall Control Panel
The wall control panel provides a wired alternative for operating your garage door. A simple push-button design allows for easy activation. This panel functions similarly to the remote control, offering convenient access. Refer to the manual for troubleshooting if the wall control panel becomes unresponsive.
Troubleshooting Common Issues
Common problems include the opener not responding, partial door movement, or excessive noise. Check the power supply and safety sensors first. If issues persist, consult the manual for specific troubleshooting steps related to your model (e.g., 53479, 139.53978SRT). Proper diagnosis ensures safe and effective repair.
Opener Not Responding
If the Craftsman 1/2 HP opener fails to respond, verify the power supply and circuit breaker. Check remote control batteries and ensure the wall control isn’t the issue. Confirm safety sensors are aligned; a misaligned sensor prevents operation. Consult your model’s manual for further guidance.
Door Opens/Closes Partially
A Craftsman 1/2 HP opener halting mid-cycle often indicates limit switch adjustments are needed. Incorrect force settings can also cause this issue. Inspect the door’s balance – a struggling door strains the opener. Refer to the manual for precise limit and force adjustment procedures.
Noisy Operation
Excessive noise from your Craftsman 1/2 HP opener often stems from inadequate lubrication. Regularly grease all moving parts, including the chain and rollers. Check for loose hardware and tighten as needed. A worn chain or damaged gears may require replacement; consult the parts diagram.
Maintenance and Care
Consistent maintenance extends the life of your Craftsman 1/2 HP opener. Regularly lubricate the chain, rollers, and springs. Inspect the chain tension and adjust if necessary. Periodically check all bolts and fasteners, ensuring they remain tight for safe and reliable operation.

Regular Lubrication Points

Key lubrication points include the garage door opener’s chain, ensuring smooth movement and reducing friction. Also, lubricate the rollers, allowing the door to glide effortlessly. Springs require periodic lubrication to maintain tension and prevent premature wear, extending the opener’s lifespan.
Checking and Adjusting Chain Tension
Proper chain tension is vital for optimal performance. Inspect the chain for excessive slack; it should have minimal play. Adjust tension using the opener’s adjustment screws, ensuring it’s not too tight or too loose. Correct tension minimizes noise and extends the chain’s life.
Warranty Information
Craftsman offers a comprehensive warranty on its 1/2 HP openers. A 90-day full warranty covers defects in materials or workmanship with free repair. A limited warranty extends from day 91 to one year, providing free replacement parts, but you are responsible for labor costs.
90-Day Full Warranty Details
For 90 days post-purchase, Sears will cover all costs associated with repairing any material or workmanship defects in your Craftsman 1/2 HP garage door opener. This full warranty ensures a completely free repair service, providing peace of mind during the initial ownership period.
Limited Warranty (91 Days ‒ 1 Year)
From the 91st day up to one year after purchase, Sears will supply replacement parts free of charge for any defective components in your Craftsman 1/2 HP opener. However, please note that you will be responsible for covering all associated labor costs for the repair.

Parts Diagram
A comprehensive parts diagram is essential for identifying key components within your Craftsman 1/2 HP garage door opener. This allows for easier location of replacement parts when needed for maintenance or repairs. Refer to detailed schematics to understand the opener’s assembly.
Identifying Key Components
Key components include the motor unit, rail, chain or belt drive, safety sensors, and both the wall and remote control units. Understanding each part’s function is crucial for troubleshooting and maintenance. Diagrams pinpoint locations, aiding in repairs and ensuring proper operation of your Craftsman opener.

Locating Replacement Parts
Replacement parts can be sourced through Sears PartsDirect, online retailers, or local hardware stores. Knowing your specific model number (e.g., 53479, 139.53978SRT) is vital for accurate ordering. The Internet Archive’s manuals often detail part numbers, simplifying the replacement process and ensuring compatibility.
Remote Control Programming
Programming additional remotes typically involves pressing the “Learn” button on the opener unit and then pressing the desired button on the new remote. Clearing existing remote codes requires resetting the opener’s memory, effectively deactivating all previously programmed remotes for enhanced security.

Programming Additional Remotes
To program a new remote, locate the “Learn” button on your Craftsman opener. Press it, initiating a learning mode. Within 30 seconds, press and hold the button on the new remote until the opener light flashes, confirming successful programming. Repeat for each additional remote desired.
Clearing Existing Remote Codes
To erase all remote codes from the system, press and release the “Learn” button on the garage door opener. Then, press and hold the “Learn” button until the indicator light flashes rapidly. This clears memory, requiring all remotes to be reprogrammed for operation;
Limit Switch Adjustment
Limit switches define the fully open and closed positions of your door. Proper adjustment is crucial for safe and reliable operation. These settings control how far the door travels, preventing over-extension or incomplete closure. Carefully adjust up and down limits for optimal performance.
Understanding Limit Switch Functionality
Limit switches electronically tell the opener when to stop the door’s movement. They prevent damage to the door, opener, and surrounding structures. These switches have adjustable screws to fine-tune the open and close travel limits, ensuring smooth and safe operation of your Craftsman opener.
Adjusting Up and Down Limits

Carefully adjust the limit switches using a screwdriver. Incremental changes are key; small adjustments to the screws control how far the door travels up and down. Test after each adjustment to avoid overtravel, which could cause damage. Proper limit settings ensure safe and reliable operation.
Force Adjustment
Proper force settings are crucial for safety and functionality. Adjusting the opener’s force determines how much power it uses to overcome resistance. Incorrect settings can lead to the door reversing unexpectedly or not closing fully. Always prioritize safety when making these adjustments, following the manual’s guidance.

Importance of Proper Force Settings
Correct force settings are paramount for garage door safety. Too much force can cause damage to the door or potentially injure someone, while too little force results in the door reversing. Precise adjustment ensures smooth operation and prevents unnecessary strain on the opener’s motor and components.
Adjusting the Opener’s Force
Carefully adjust the force settings using the control panel’s adjustment knobs. Begin with the lowest setting and incrementally increase it until the door operates smoothly without reversing prematurely. Regularly test the safety sensors during adjustment to confirm proper functionality and prevent potential hazards.
Safety Sensors
Essential for safety, these sensors prevent the door from closing on obstructions. Regularly test alignment by interrupting the beam while the door is closing; the door should immediately reverse. Troubleshooting involves checking wiring connections and ensuring lenses are clean and unobstructed for reliable operation.
Testing Safety Sensor Alignment
To test, place an object in the door’s path while lowering it. The door must reverse immediately, indicating proper sensor function. If it doesn’t, verify the lenses are clean and correctly aligned, ensuring the indicator lights are solid, not blinking, for safe operation.
Troubleshooting Safety Sensor Issues
If sensors fail, check wiring connections and ensure lenses are clean. Blinking lights often indicate misalignment or obstruction. Verify the sensors are securely mounted and free from debris. A faulty sensor requires replacement; consult the manual for part numbers and proper installation procedures.
Wiring Diagram
The wiring diagram details electrical connections for safe operation. Identifying common wiring problems, like loose connections or damaged wires, is crucial. Always disconnect power before inspecting wiring. Refer to the manual for specific color codes and terminal locations to ensure correct installation and prevent electrical hazards.
Understanding the Electrical Connections
Properly understanding electrical connections is vital for safe installation. The opener requires a grounded 120V outlet. Carefully identify each wire’s function – power, ground, and sensor connections – before connecting. Incorrect wiring can cause malfunctions or create a safety hazard; consult the diagram.
Identifying Common Wiring Problems
Common wiring issues include loose connections, frayed wires, and incorrect wiring configurations. A lack of power often stems from a tripped breaker or a faulty outlet. Inspect wiring for damage and ensure secure connections. Always disconnect power before troubleshooting electrical components for safety.
Accessing Online Resources
Numerous online resources offer support for Craftsman 1/2 HP openers. The Internet Archive hosts downloadable manuals for models like 139.53978SRT and 139.18473D. The official Craftsman support website provides additional documentation, FAQs, and troubleshooting assistance for various models.
Downloading Manuals from Internet Archive
The Internet Archive is a valuable source for older Craftsman manuals. You can find and download PDF versions of user guides for models like 53479, 139.53978SRT, 139.18473D, and 139;53915D, often available in multiple formats including JP2 and TORRENT.
Craftsman Support Website
While specific direct links weren’t provided, the Craftsman support website is the primary resource for current model information. It likely hosts manuals, troubleshooting guides, and parts diagrams for newer 1/2 HP openers. Check the official Sears or Stanley Black & Decker websites for assistance.
Disposal and Recycling
Responsible disposal of your old Craftsman 1/2 HP garage door opener is crucial. Do not simply discard it with regular waste. Explore local recycling options for metal components and electronic parts. Check with your municipality for designated e-waste collection facilities or recycling programs.
Proper Disposal of Old Openers
When replacing your Craftsman 1/2 HP opener, avoid landfill disposal. These units contain recyclable materials like metal and electronics. Contact local waste management for e-waste guidelines. Some retailers offer take-back programs. Disassembling the unit may be required for proper component separation.
Recycling Options
Explore local recycling centers accepting electronic waste (e-waste). Many communities host periodic collection events. Metal components, like the motor housing and rails, are highly recyclable. Check with scrap metal dealers for potential acceptance. Proper recycling minimizes environmental impact and conserves valuable resources.
Frequently Asked Questions (FAQ)
Where can I find a downloadable manual? The Internet Archive hosts numerous Craftsman garage door opener manuals, including models 53479 and 139.53978SRT. What does the warranty cover? A 90-day full warranty covers defects, while a limited warranty extends to one year for parts.