Manual Camera Cheat Sheet: A Comprehensive Guide
This comprehensive guide distills photographic know-how for all levels, offering organized insights into camera settings and techniques,
from exposure control to focusing and white balance adjustments.
It’s a resource for understanding Camera Raw preferences, troubleshooting GPU conflicts, and ensuring your camera functions correctly.
Understanding Exposure: The Core Triangle
Exposure, the foundation of photography, is governed by the interplay of three key settings: aperture, shutter speed, and ISO. Mastering this “exposure triangle” is crucial for achieving well-exposed images and creative control.
Aperture controls the lens opening, influencing depth of field – the area in focus. A wider aperture (lower f-number) creates a shallow depth of field, ideal for portraits, while a narrower aperture (higher f-number) yields greater depth of field, suitable for landscapes.
Shutter speed dictates how long the camera’s sensor is exposed to light. Faster shutter speeds freeze motion, while slower speeds blur it, offering artistic effects.
ISO measures the sensor’s sensitivity to light. Lower ISO values produce cleaner images, but require more light. Higher ISO values allow shooting in low light, but introduce noise or grain. Balancing these three elements is key to proper exposure.
Aperture: Controlling Depth of Field
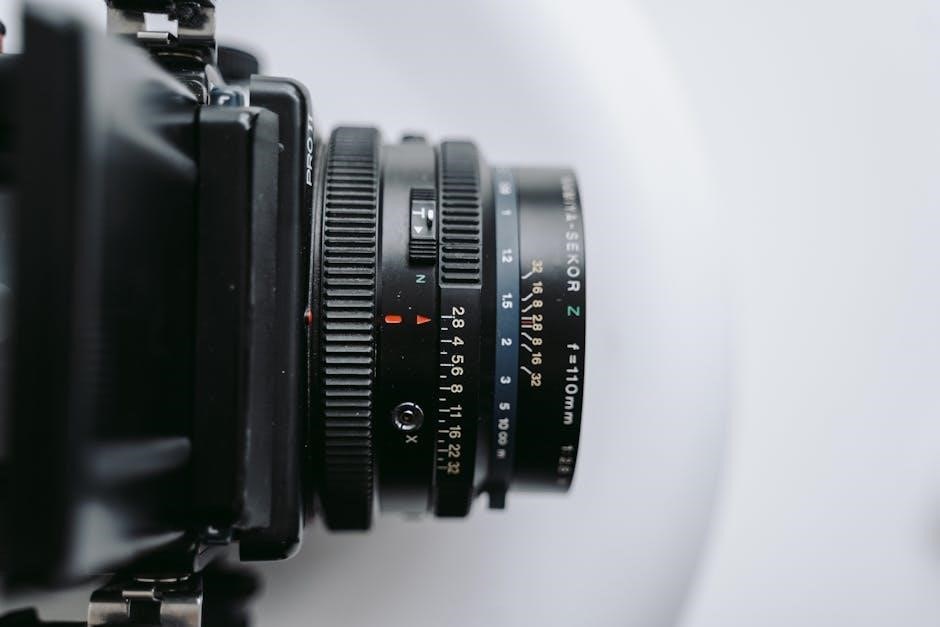
Aperture, expressed as an f-number (e.g., f/2.8, f/8, f/16), regulates the size of the lens opening, directly impacting depth of field (DoF) – the portion of the image appearing sharp. A lower f-number signifies a wider aperture, resulting in a shallow DoF, effectively isolating the subject against a blurred background. This is favored for portraits and macro photography.
Conversely, a higher f-number indicates a narrower aperture, yielding a large DoF, where more of the scene remains in focus. This is ideal for landscapes and group photos where sharpness throughout the frame is desired.
Remember, aperture also influences light intake; wider apertures let in more light, enabling faster shutter speeds or lower ISO settings. Understanding this relationship is vital for achieving correct exposure alongside desired creative effects.
Shutter Speed: Freezing or Blurring Motion
Shutter speed, measured in seconds or fractions of a second (e.g., 1/1000s, 1/60s, 1s), determines how long the camera’s sensor is exposed to light. It’s a crucial element in capturing or conveying motion.
Fast shutter speeds (e.g., 1/500s or faster) effectively “freeze” motion, ideal for sports photography or capturing fast-moving subjects with clarity. Conversely, slow shutter speeds (e.g., 1/30s or slower) intentionally blur motion, creating a sense of movement or ethereal effects, often used for waterfalls or light trails.
Be mindful of camera shake when using slow shutter speeds; a tripod is often necessary to maintain sharpness. Shutter speed also impacts brightness – slower speeds let in more light, while faster speeds require more light or a wider aperture/higher ISO.
ISO: Sensitivity to Light
ISO represents your camera sensor’s sensitivity to light. Lower ISO values (like 100 or 200) mean the sensor is less sensitive, requiring more light for a proper exposure and resulting in cleaner images with minimal noise. Higher ISO values (like 800, 1600, or higher) increase sensitivity, allowing you to shoot in darker conditions.
However, increasing ISO comes at a cost: image noise, which appears as graininess or speckling. While modern cameras handle high ISOs better than older models, it’s generally best to keep ISO as low as possible to maintain image quality.
Understanding the trade-off between brightness and noise is key. Use higher ISOs when necessary, but be aware of the potential impact on your final image’s clarity.
Metering Modes: Getting the Right Exposure
Metering modes determine how your camera measures light to calculate the correct exposure. Choosing the right mode is crucial for well-exposed photographs, especially in challenging lighting situations. There are three primary metering modes:
Evaluative/Matrix Metering analyzes the entire scene, averaging the light levels to determine exposure; It’s a versatile option for general photography. Center-Weighted Metering prioritizes the light in the center of the frame, useful when your subject is centrally located.
Spot Metering measures light from a very small area, allowing precise exposure control for specific subjects, even against bright or dark backgrounds. Experiment with each mode to understand how they affect your images in different scenarios.
Evaluative/Matrix Metering
Evaluative metering, often called Matrix metering by Nikon, is your camera’s default mode for a reason – it’s incredibly versatile. This mode analyzes the entire scene, dividing it into segments and assessing the light in each. It then averages these readings, considering factors like color and contrast, to determine the optimal exposure.
It’s particularly effective in evenly lit conditions and general photography where a balanced exposure across the frame is desired. However, be mindful in high-contrast scenes. The camera might be fooled by bright or dark areas, leading to underexposure or overexposure of your subject.
It’s a great starting point, but always review your histogram to ensure accurate results.
Center-Weighted Metering
Center-weighted metering prioritizes the light readings from the center of the frame, gradually decreasing sensitivity as you move towards the edges. This mode is a step up from evaluative metering when your primary subject is centrally located. It’s beneficial for portraits or subjects that don’t occupy the entire frame, ensuring they are properly exposed.
Unlike spot metering, it doesn’t rely on a single point, offering a broader area of influence. However, it can still be susceptible to strong light sources in the periphery affecting the overall exposure.
It’s a good choice when you want to emphasize the subject in the center, but remember to check the histogram and adjust exposure compensation if needed, especially in challenging lighting situations.
Spot Metering
Spot metering is the most precise metering mode, measuring light from a very small area – typically around 1-5% of the frame. This allows you to accurately expose for a specific part of the scene, ignoring the overall brightness or darkness. It’s incredibly useful in high-contrast situations where evaluative or center-weighted metering might be fooled by bright or dark elements.
To use it effectively, carefully select your metering point on the subject you want correctly exposed; This is crucial, as the camera will base its exposure solely on that tiny area.
Spot metering requires more skill and attention, but provides the greatest control over exposure in challenging lighting conditions, ensuring your subject is perfectly lit.
Focusing Modes: Achieving Sharpness
Achieving sharp focus is paramount in photography, and your camera offers several focusing modes to help. Understanding these is key to capturing clear images. The primary modes are Single-Point Autofocus (AF-S/One-Shot), and Continuous Autofocus (AF-C/AI Servo).
AF-S/One-Shot is ideal for stationary subjects. The camera locks focus when you half-press the shutter button, and it remains locked even if the subject moves. AF-C/AI Servo, conversely, continuously tracks the subject’s movement, adjusting focus as needed – perfect for action or sports photography.
Don’t forget Manual Focus! While requiring more effort, it grants complete control, especially useful in low light or when autofocus struggles. Mastering these modes unlocks sharper, more impactful images.
Single-Point Autofocus (AF-S/One-Shot)
Single-Point Autofocus (AF-S/One-Shot) is your go-to for static subjects. This mode excels when your subject isn’t moving, offering precise control over the focal point. The camera focuses once when you half-press the shutter button, and crucially, holds that focus, even if you or the subject shifts slightly.
To utilize it effectively, select a single focus point – often the center one – and position it directly on your intended subject. Half-press the shutter to lock focus, then recompose your shot if needed, maintaining the half-press until you fully depress the shutter.
This mode is ideal for landscapes, portraits of still subjects, and any scenario where movement isn’t a factor, ensuring consistently sharp results.
Continuous Autofocus (AF-C/AI Servo)
Continuous Autofocus (AF-C/AI Servo) is designed for tracking moving subjects. Unlike single-point, this mode doesn’t lock focus upon initial half-press; instead, it continuously adjusts focus as the subject moves, predicting its trajectory to maintain sharpness. It’s a dynamic system, constantly working to keep your subject in focus.
Select a focus point (or allow the camera to choose one) and keep the shutter button half-pressed as your subject moves. The camera will actively track and refocus. This mode is essential for sports photography, wildlife, and capturing action shots;
Experiment with different focus area modes within AF-C to optimize tracking performance for varying subject speeds and patterns.
Manual Focus: Taking Control
Manual Focus relinquishes autofocus control, placing precision directly in your hands. Switch your lens to ‘MF’ and use the focusing ring to adjust sharpness. This is invaluable when autofocus struggles – in low light, with low-contrast subjects, or through obstructions like glass.
Utilize focus peaking (if your camera offers it), which highlights in-focus areas on the screen, aiding precise adjustments. Zooming in on your subject via live view further enhances accuracy. Manual focus demands patience and practice, but rewards you with ultimate control.
It’s particularly useful for macro photography and situations requiring critical focus, offering a level of precision autofocus often can’t achieve.
White Balance: Accurate Color Representation
White Balance (WB) ensures colors appear natural, correcting for different lighting conditions. Incorrect WB results in color casts – images appearing too blue, yellow, or magenta. Cameras offer several WB options.
Auto White Balance (AWB) is convenient but can be unreliable, especially in mixed or unusual lighting. Preset options (Daylight, Cloudy, Shade, Tungsten, Fluorescent) provide quick fixes for common scenarios. For greater accuracy, use Custom White Balance.
This involves photographing a white or gray card under the existing light and telling the camera to use that as a reference. Mastering WB is crucial for achieving accurate and pleasing colors in your photographs, avoiding post-processing color correction.
Auto White Balance (AWB)

Auto White Balance (AWB) is the default setting on most cameras, designed to automatically determine the correct color temperature for a scene. While convenient, AWB isn’t always reliable, particularly in challenging or mixed lighting situations. It attempts to neutralize color casts, but can sometimes misinterpret the scene.
AWB works best in consistent daylight. However, it can struggle with artificial light sources like fluorescent or tungsten bulbs, often producing inaccurate colors. When AWB fails, images may exhibit unwanted blue or yellow tones.
Experienced photographers often prefer manual white balance settings for greater control and consistent results, especially when shooting in RAW format for post-processing flexibility.
Preset White Balance Options
Preset White Balance options offer a convenient alternative to Auto White Balance, providing pre-defined settings for common lighting conditions. These typically include Daylight, Cloudy, Shade, Tungsten (incandescent), Fluorescent, and Flash. Selecting the appropriate preset helps your camera accurately render colors in specific environments.
Daylight is suitable for sunny conditions, while Cloudy adds warmth to compensate for cooler light. Shade is ideal for shooting in shadows, and Tungsten corrects for the yellow cast of incandescent bulbs. Fluorescent addresses the green tint often produced by fluorescent lighting, and Flash balances the color temperature of your flash.
Using presets is a good starting point, but fine-tuning may still be necessary for optimal results, especially in complex lighting scenarios.
Custom White Balance
Custom White Balance provides the highest level of accuracy in color representation, allowing you to precisely calibrate your camera to the specific lighting conditions of a scene. This is particularly useful when shooting in challenging or mixed lighting where presets fall short.
The process typically involves photographing a neutral gray card or white object under the existing light. Your camera then uses this reference point to establish a custom white balance setting. This ensures that white appears truly white, and all other colors are rendered accurately.
While more involved than using presets, Custom White Balance delivers superior color fidelity, crucial for professional work or when precise color accuracy is paramount. It’s a powerful tool for achieving consistent and natural-looking images.
Shooting Modes: Choosing the Right Setting
Shooting Modes dictate how much control you have over your camera’s settings. Understanding these modes is fundamental to achieving desired photographic results. Aperture Priority (Av/A) allows you to set the aperture, controlling depth of field, while the camera automatically selects the shutter speed.
Shutter Priority (Tv/S) lets you choose the shutter speed, freezing or blurring motion, with the camera adjusting the aperture accordingly. This is ideal for action or creative effects. Manual Mode (M) grants complete control over both aperture and shutter speed, offering maximum creative flexibility.
Choosing the right mode depends on your subject and desired outcome. Automatic modes are convenient, but mastering these three priority modes unlocks significant creative potential and allows for consistent, intentional photography.

Aperture Priority (Av/A)
Aperture Priority (Av/A) mode empowers you to control the depth of field – the area of your image that appears sharp. By selecting a wider aperture (lower f-number like f/2.8), you create a shallow depth of field, ideal for portraits with blurred backgrounds, isolating your subject beautifully.
Conversely, a narrower aperture (higher f-number like f/16) yields a greater depth of field, keeping more of the scene in focus, perfect for landscapes. The camera automatically calculates the appropriate shutter speed to achieve correct exposure based on your chosen aperture and the available light.
This mode is excellent for situations where controlling depth of field is paramount, allowing you to focus on artistic expression while the camera handles exposure.

Shutter Priority (Tv/S)
Shutter Priority (Tv/S) mode grants you control over motion blur or freezing action within your photographs. Selecting a fast shutter speed (e.g., 1/1000s) effectively freezes fast-moving subjects, capturing sharp details in sports or wildlife photography. This minimizes any blurring caused by movement.
Conversely, a slow shutter speed (e.g., 1/30s or longer) intentionally blurs motion, creating a sense of movement or ethereal effects, ideal for capturing light trails or silky smooth water. The camera automatically adjusts the aperture to maintain proper exposure.
This mode is invaluable when you need to dictate how motion is represented, letting you creatively manipulate time and movement within your images.
Manual Mode (M)
Manual Mode (M) provides complete creative control, allowing you to independently set both aperture and shutter speed. This mode demands a thorough understanding of the exposure triangle – aperture, shutter speed, and ISO – to achieve the desired results. It’s the ultimate test of photographic skill and understanding.
While initially challenging, Manual Mode unlocks unparalleled artistic freedom. You’re no longer constrained by the camera’s automatic interpretations, enabling precise control over depth of field, motion blur, and overall brightness. Mastering this mode is crucial for consistent results in varying lighting conditions.
It’s the preferred choice for experienced photographers seeking full command over their images, allowing for unique and personalized visual expression.